I have previously posted a detailed review of Hostgator hosting, and despite problems I have had with Hostgator in the past, they are still one of the best shared hosting solutions for WordPress.
Hostgator offers various hosting plans, the most popular of which is the Baby hosting plan. This plan offers unlimited bandwidth, unlimited storage, and unlimited domains. This means that with one Baby hosting plan, you can host unlimited websites! I personally host five medium traffic websites on Hostgator’s Baby plan, and my uptime is great.

- Check out: Hostgator Discount Coupon
Even if you have purchased a domain from a source such as GoDaddy or Name Cheap, all you need to do is change the name server of your domain to point to your Hostgator account, and add your domain as an add-on domain from the cPanel in Hostgator.
How to use Hostgator’s add-on domains feature:
This tutorial is valid for either the Baby or business shared hosting plan. Login to your Hostgator account and click on “Add-on domains” under the domains section. See the screenshot for better understanding: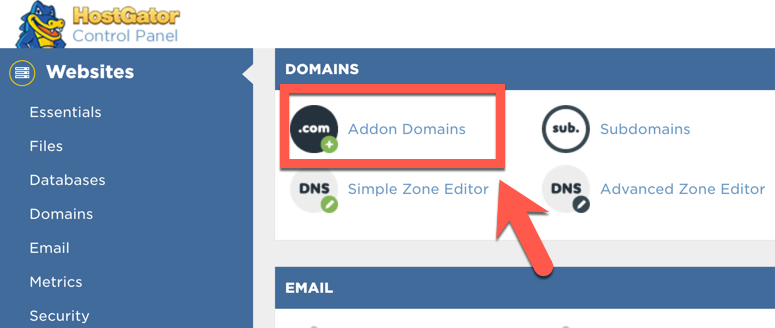
You will be redirected to the Add-on domains screen, where you need to enter a few details which I have explained below.
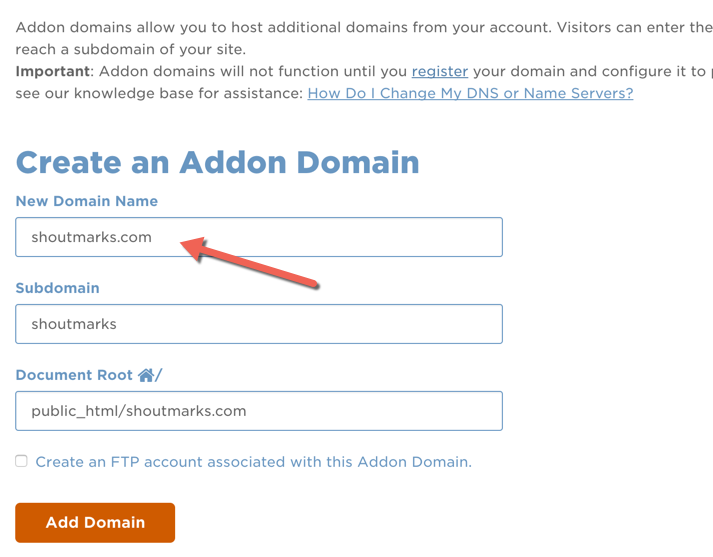
You need to create an FTP username and password. You can choose your password yourself or you can generate a complicated password by using the password generator offered under cPanel. The “Document Root” section defines the root of the domain you are adding. I usually use Public_html/domainname as the Document Root, as it makes it easier for me when I need to give FTP access to developers.
Here is how final screen would look like:
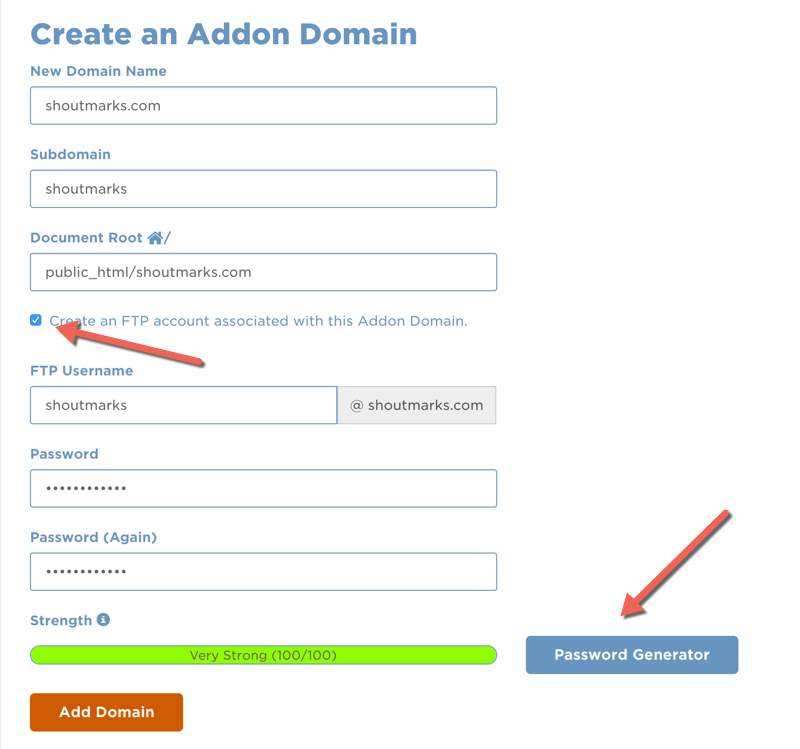
Once done, click on “Add Domain” and you have successfully added an additional (add-on) domain to your Hostgator account!
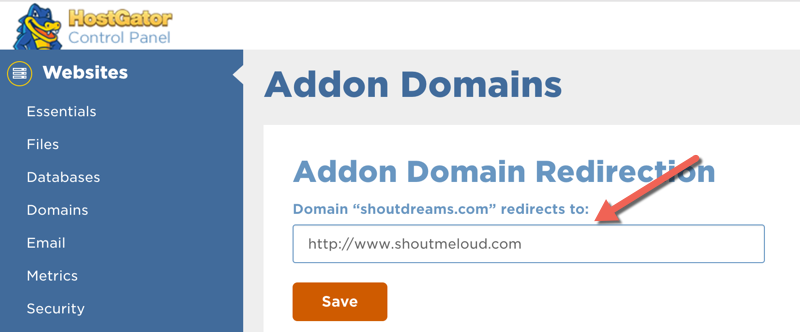
This feature is also useful when you have purchased other domain extensions (.org, .info, etc.) to preserve your brand name. After adding the additional domains, you can use Hostgator’s redirection feature on the same page, to redirect the add-on domains to your main domain name.
What to do next after adding a domain:
Again, you can use the redirection feature to redirect any additional domains to your main domain. If you creating a new blog, you can refer to my guide on How to Install WordPress on Hostgator.Note: If you have several domains under your domain registrar and you are not doing anything with them, I recommend that you install WordPress instead of keeping them idle, and read my guide on SEO for parked domains to make the most of this concept.
Check out Hostgator
Use the comments section below to let me know if you have ever used the add-on domain feature from within your Hostgator cPanel account.
As always, if you have any questions, feel free to ask.
If you find the information in this post useful, please share it with your friends and colleagues on Facebook, Twitter and Google Plus.

No comments:
Post a Comment